 Skip to content
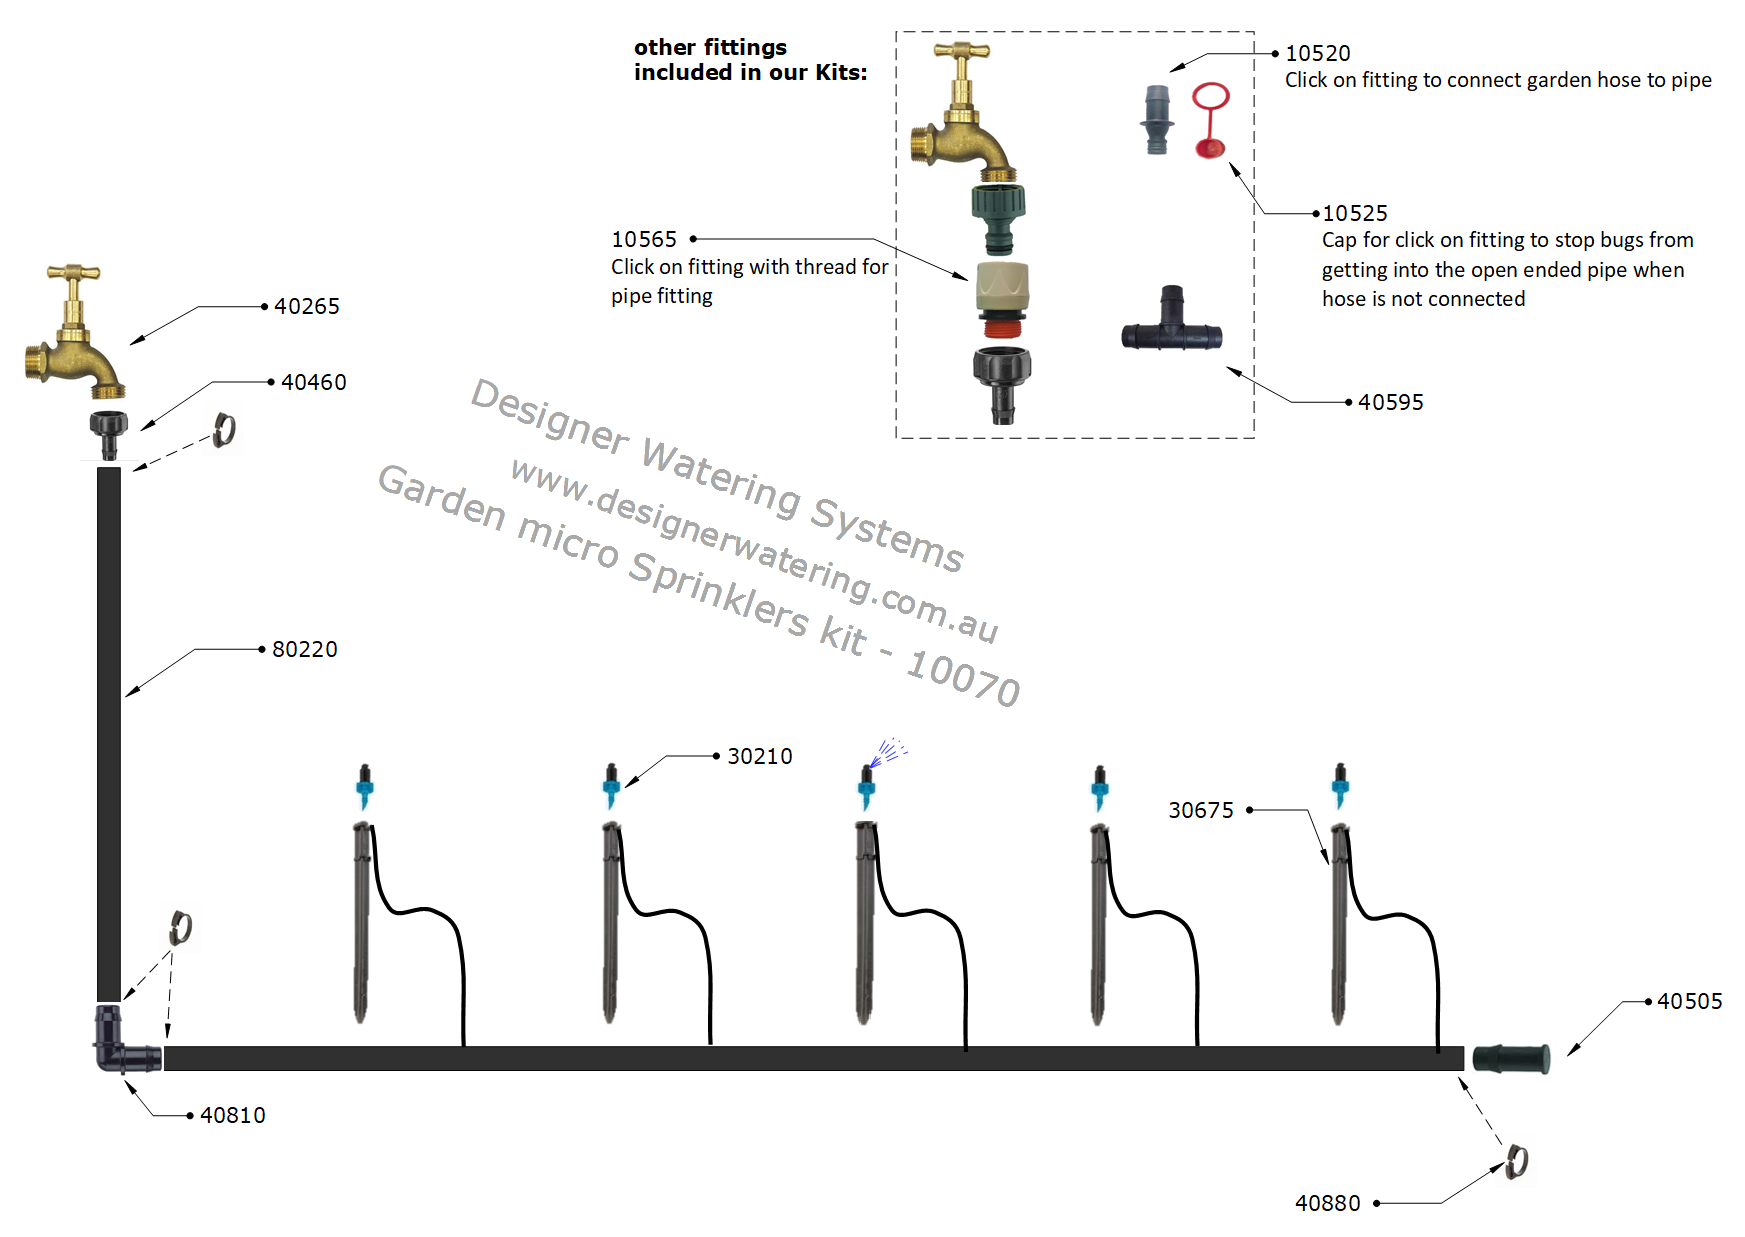
Garden Micro Sprinklers Kit product code: 10070
Garden Sprinklers Selection:
| Item | Product Code |
|---|---|
| 90° (¼ circle), 1.8mt throw | 30210 |
| 180° (½ circle), 1.0mt throw | 30245 |
| 180° (½ circle), 1.5mt throw | 30255 |
| 180° (½ circle), 1.8mt throw | 30260 |
| >< pattern, covers 3.6mt x 1.0mt | 30390 |
| >< pattern, covers 5.0mt x 0.5mt | 30395 |
| 360° (full circle), 2.0mt diameter | 30290 |
| 360° (full circle), adj 0mt - 2.4mt diameter | 30470 |
| 360° (full circle) spinner, 4.0mt diameter | 30335 |
| 360° (full circle) spinner, 5.0mt diameter | 30345 |
The Components Views above and below are an indication of what makes up a residential watering system. The numbers on the diagrams are product codes that can be entered directly into the 'Search Box' to take you to that component in our Online Shop, while the easiest way to select a Garden Sprinkler head is by selecting from our sprinkler info page.
Both Contractors and DIYs alike normally use 25mm black Poly pressure pipe (which has a bore size of approx 20mm) from the water connection point to the on/off manual or automatic control valves, then 19mm black "low density" poly pipe from the valves out to the sprinklers. Pipe with a bore size of approx 25mm is the next size up, for those people with higher flowrates (which means you may be able to run more sprinklers at once) and/or longer pipe runs where you would lose a lot of pressure in smaller pipe.
There are three main options of connecting to your water supply:
- Connecting straight to the Tap with pressure pipe, low density pipe, manual multi-outlet distributors, manual timers or battery-operated automatic timers.
- Adding a 2nd Tap to your existing Tap for your Irrigation system, so that you still have a Tap for general use.
- Connecting into your house mainline, somewhere between the water meter and the front of the house. In Brisbane, this mainline is usually 20mm or 25mm Poly pipe, Copper or Galvanised Iron.
The most popular connection point is the front Garden Tap which is usually connected straight to the house mainline, and therefore should still have a reasonable flowrate without having to cut into your mainline. This is Option 2, and the one shown in the Components View.
Additionally, there are a number of ways of controlling the on/off operation of your different sprinkler zones:
- Manual twin tap and multi-outlet distributors connected straight to your Garden Tap. The final shut-off operation should be controlled by the Garden Tap as these valves are not pressure rated.
- Manual in-line valves. The final shut-off operation should be controlled by the Garden Tap as these valves are not pressure rated.
- Manual pressure-rated on/off Valves.
- Battery-operated single & multi-station automatic Controllers and Valves. In most cases these are of a lesser quality than the 24Vac Controllers.
- 24Vac automatic Controllers and Valves. The Controller plugs into your 240Volt power point then has a Transformer reducing the power supply to a safe 24Vac.
The most popular method of automatic control is Option 5.
The method of manual control is purely a personal decision, however, if you are looking at converting to automatic at a later date, go with Option 3.
Option 5 is shown in the Components View.
Point of Interest:
There are really only 3 sections to an irrigation system
- Water supply (Water connection point to the control valves).
- Manual or Automatic sprinkler zone control, whichever is applicable.
- The sprinkler zone which includes sprinklers, sprinkler pipe and fittings.
Basic rules to follow to ensure you have a system that performs well:
- Do not exceed 80% of your available Flowrate from your tap. The leftover pressure will go toward propelling the water outwards.
- Stay within a 30Lt/min flowrate for the 19mm Pipe, even if you have better flowrate results, as the faster moving water may cause blowouts. Total sprinkler flowrate will be calculated by adding together all the individual sprinkler flowrates within a zone (see Sprinkler Info page).
- Do a Head to Head sprinkler layout along a lateral run. This means sprinklers with a 5mt radius should be spaced no further than 5mt apart creating at least 100% overlap.
- Group your sprinklers within a zone according to their style of watering and application e.g. keep your lawns and gardens separate. The four main sprinkler groups in our Website are:
- Garden micro sprinklers.
- Static (non-rotating) lawn sprinklers.
- Mid-range single jet rotating lawn sprinklers.
- Longer range single jet rotating lawn sprinklers.
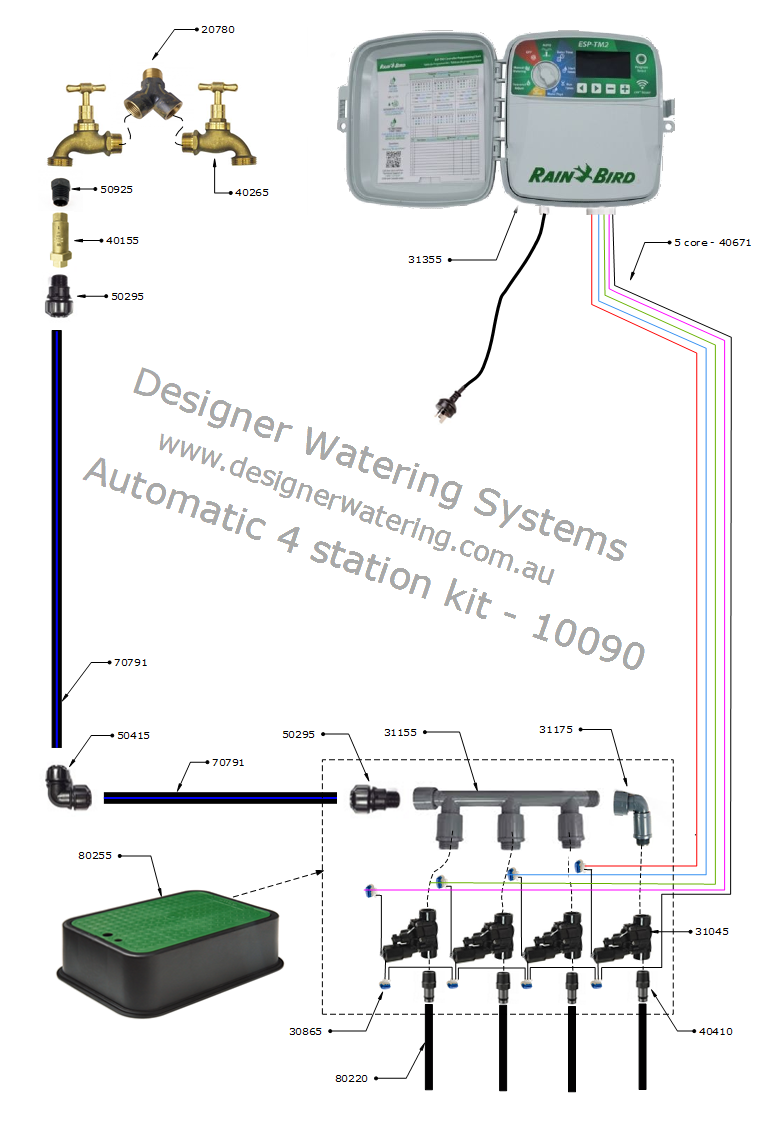
Automatic 4 Station Kit product code: 10090
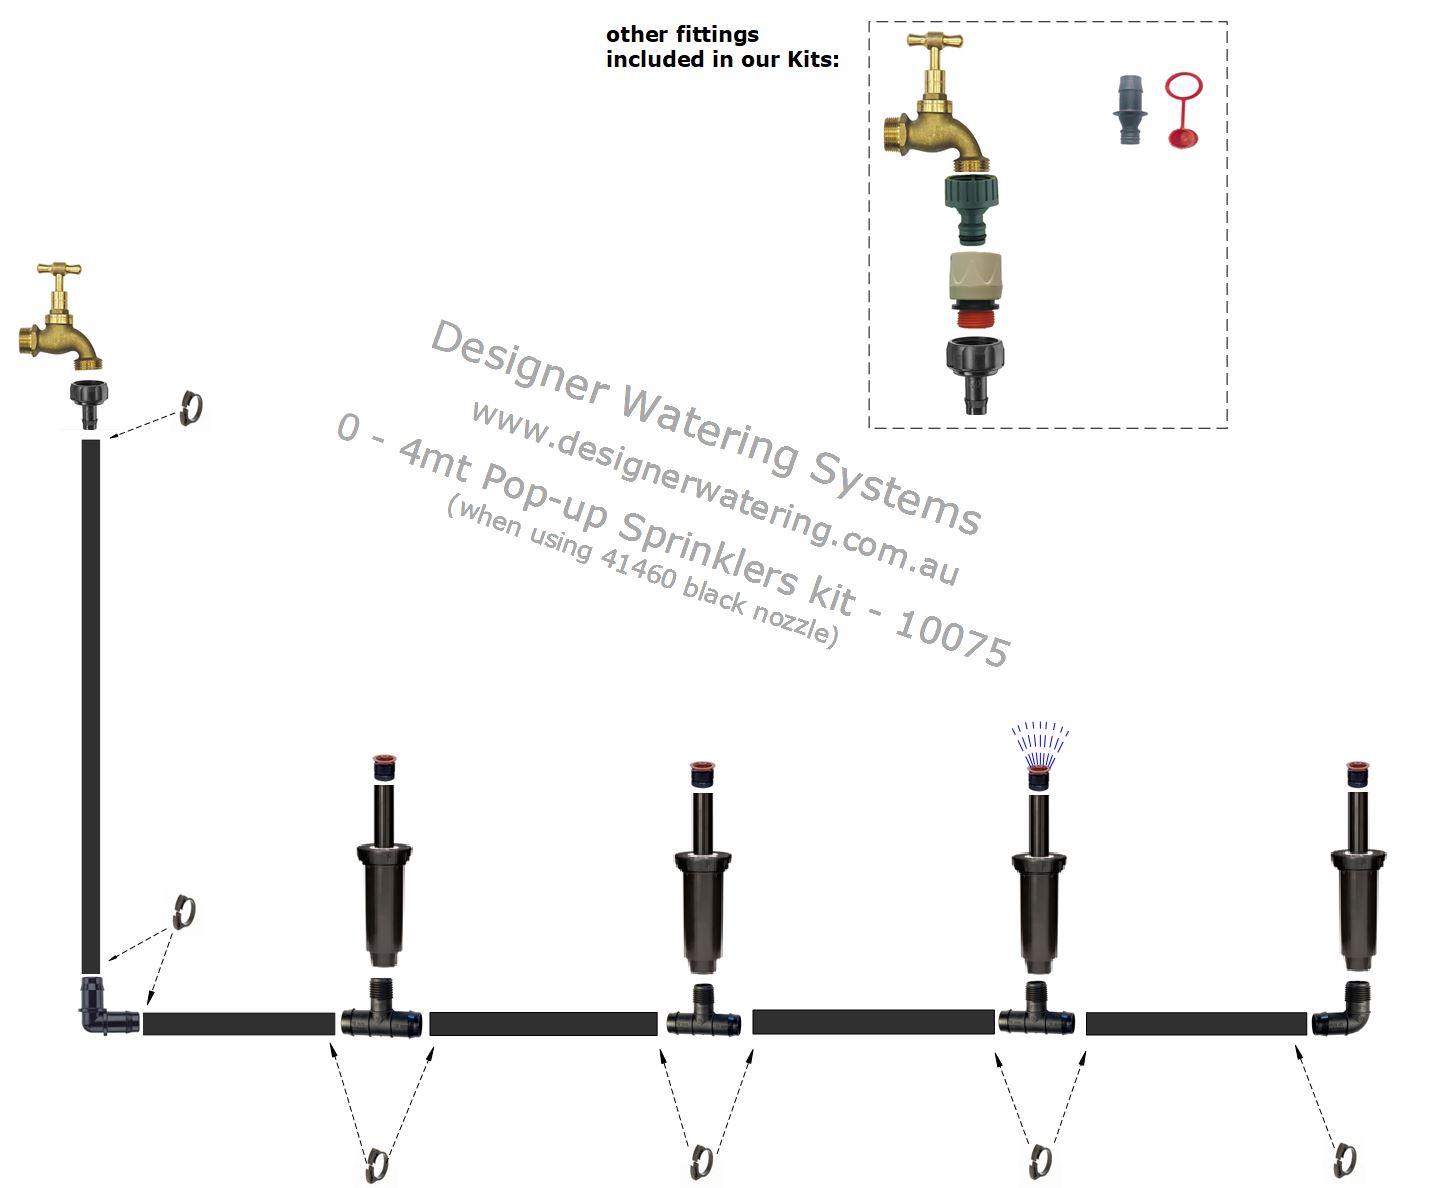
0 - 4mt Pop Up Sprinklers Kit product code: 10075
Nozzle selection for lawn pop-up sprinkler bodies (static non-rotating):

Kit of 4mt - 7mt radius Pop-up Sprinklers: 10080

7 - 10mt Pop Up Sprinklers Kit product code: 10085

Automatic 6 Station Kit product code: 10095